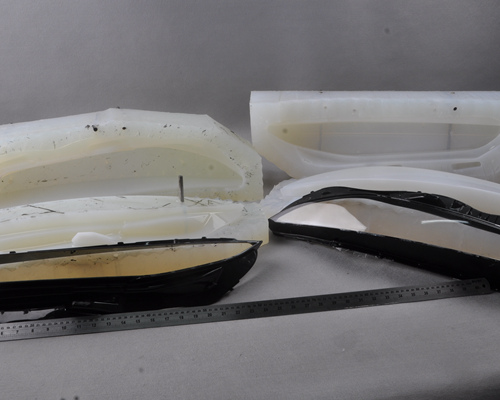
Prototypes are built so that a product can be tested first before fabricating it for final productization. As far as we know, the means of manufacturing a plastic prototype and fabricating the final product are different, and the reasons may include the cost, lead time, and revision flexibility. Usually, plastic products are mass-produced through various molding methods (e.g., injection, rotational, blow molding, thermoforming).These methods are cost-effective and practical for high-volume products; however, this is not the case for prototype making. The upfront cost for these methods is significantly high, making it unreasonable for producing low-volume products –so this is where the prototyping methods come in.
A plastic prototype company may offer different fabrication processes to produce a part, from advanced additive methods (e.g., Stereolithography, Selective Laser Sintering, Fused Deposition Modeling) to a more traditional approach like rapid injection molding and CNC plastic machining. In this article, the focus will be a bit shifted to machining plastics, and we will be walking you through the fundamental “know-hows” for a successfully machined plastic part.

How to Creat a Plastic Prototype ?
As mentioned, there are many methods used for plastic prototype manufacturing, and the commonalities among these are their suitability for low volume production and their ability to produce parts rapidly. Each of these methods has advantages over others, and below are some of the popular ones:
 Additive Manufacturing
This is more popularly known as 3D printing, wherein the part is formed by binding layers of material together. The fabrication process for this is pretty straightforward. It involves designing a CAD file, setting up the machine, and loading up your raw material. The most common methods of 3D printing include Stereolithography (SLA), Selective Laser Sintering (SLS), and Fused Deposition Modeling (FDM).
This fabrication method is best used for producing prototypes with highly complex geometry. However, there are common problems with 3D printing: the limited availability of materials, the “not-so” smooth surface finish, and the less reliable strength of printed parts, which might not serve the purpose of mimicking your final product’s effectiveness and functionality. Designers typically use this prototyping method to get a glimpse of the actual product’s size and shape.
Rapid Injection Molding
This prototyping method has the same process as the general injection molding. This involves forcing molten plastic into a mold, except that the mold used for rapid injection molding is made at a shorter lead time and a cheaper cost. Molds for this fabrication method are usually made from a softer material, like aluminum, instead of the traditional steel to reduce tooling cost and enable rapid production.
This method has a wide availability of material selection and can attain a smooth surface finish. Additionally, rapid injection molding is perfect for producing a relatively high amount of prototypes since a mold is still being used. This fabricating method is standard for creating prototypes that need a relatively higher quantity required for multiple testing. Explore more rapid bridge tooling here.
CNC Machining
This traditional method is the most reliable and most established way of fabricating a plastic part, especially for prototypes with small quantities. Machining a part starts with a piece of material blank loaded on the CNC machine, wherein a part of that material is subtracted by a cutting tool to form the part.
The best thing about making a prototype through machining is its versatility and ability to produce complex parts. When machining, almost any machinable plastic can be worked on, including transparent plastics like acrylic, soft ones like machining wax, and even the hardest engineering plastics. Prototypes used for aerospace and other high-strength applications are usually machined to simulate the actual strength and function of the part being developed.
Some of the benefits of plastic prototype machining:
● Excellent Mechanical Quality
● Dimensional Accuracy
● Excellent Surface Finish (e.g., clear, glossy, smooth)
● No need for expensive molds
● Shorter Lead Times
There are a wide range of plastics that we offer through our custom CNC machining service, including ABS, PC, PP, POM, PMMA (Acrylic), HDPE, Teflon, PEEK and many others.
Challenges Faced When Machining Plastic Prototypes
Machining a prototype may seem an easy process because it is a softer material; however, this is not the case. Like almost any method, some things need to be considered behind achieving your desired finish and accuracy for a plastic part. To make you aware of the challenges you might face when machining, we have enumerated the most common ones below:
Plastics tend to deflect from their clamping
Due to their softer properties compared to metals, plastic work parts may slip or even deflect during the machining operations. Plastic materials may not have enough rigidity to resist distortion brought by the cutting action.
Plastics are relatively heat sensitive
The heat generated while the cutting tool engages with the material may cause thermal expansion for the work part. This results in a significantly altered part dimensional accuracy and surface finish. Some plastic materials have different properties when heated; some melt, some become brittle, and some become prone to chipping.
May produce stubborn burrs
This is very common for machining “gummier” types of plastics because they may form varying types of burrs, which may obstruct holes, ruin a part’s overall appearance, or even result in part scrapping.
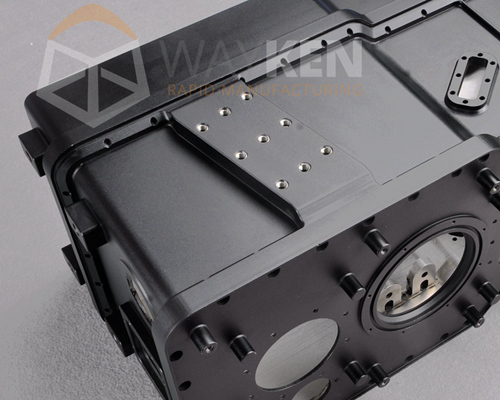
We provide one-stop & on-demand services
Equipped with high-precision 3, 4, and 5-axis continuous CNC machine tools, and able to process various complex or high-precision parts. We also have experienced finishing professionals, who not only provides a wealth of post-processing methods but also the highest surface roughness achieves Ra0.02. Our one-stop professional services and on-demand production saves you the time of searching.
5 Tips for a Successful Machined Plastic Prototype
Now that you are aware of the common problems in machining plastic, below are some tips for avoiding these common issues in your plastic part:
1. Know the properties of the plastic to be machined
A part’s behavior may vary depending on what type of plastic is being worked on –machining nylon is different from machining acrylic or so for other plastics. They have different properties (others may be softer while others may be so brittle) and have different heat thresholds. These unique plastic properties call for varying machining techniques, tooling selection, and machining parameters.
2. Ensure a Rigid Work holding
Rigidity is critical when machining plastic parts to avoid part deflection and excess vibration during the machining proper. There are many ways to secure your work holding jigs and fixtures. These may include: adding ridges to your clamping mechanism, using the appropriate size of collets, and designing a broader surface area engagement of the part with the fixture.
3. Use the Proper Cutting tools
Tooling selection is also essential in machining plastics because the tooling geometry and material directly affect heat generation. Below are some general points to take into account to:
● Uncoated carbide toolings deal with plastic materials much better.
● Use polished toolings. Dull bits tend to generate a considerable amount of heat.
● Use cutting tools that have a maximized chip evacuation clearance. Clearance helps in minimizing heat produced during cutting. Use drills with twist angles of 12 degrees to 18 degrees.
4. Know the proper Machining Parameters
Like the tooling geometry, the machining parameters also have a significant effect on the plastic part machining. Feed rates are dependent on the stiffness of your material stock. For example, it is advisable to have a slower speed but a much faster feed rate for plastic materials like acrylic. This assures you from avoiding lousy surface finish and excessive burrs because it prevents your material from gumming up.
Moreover, plastics could not take as much pressure as metals. So, when milling, stay away from the too aggressive depth of cut. And when drilling, lift the drill often to help chips vacate the hole (peck drilling).
5. Know the Different Polishing Processes
There are many ways a plastic’s surface can be finished, and buffing is the most common way to do it mechanically. Buffing uses an abrasive medium to abrade and polish the surface of a plastic. Typically, to achieve the smoothest surface finish, machinists buff their part from course material down to the finest abrasive, like polishing compounds. Aside from buffing, other polishing techniques may also include flame polishing, vapor polishing, and optical machining.
Conclusion: Key Takeaways
Plastic prototypes may be fabricated through additive manufacturing (3D printing), rapid injection molding, and machining. Prototyping through 3D printing is used by designers to get a general view of the form of their product. The rapid injection molding method is used for producing prototypes requiring high volumes. Finally, for high-strength and critical applications, machining is the preferred prototyping method.
Machining your prototypes offer excellent mechanical quality, dimensional accuracy, superior surface finish, and shorter lead times. When machining your prototype, it is vital to note that plastics, when machined, tend to deflect from their clamping, be damaged by heat, and may have stubborn burrs. To avoid these issues, you need to consider five things: the type of plastic, work holding, tooling selection, machining parameters, and the polishing methods for plastic prototype.